Add and apply a deposit

Übersicht
You create a deposit item directly on your orderbird MINI in the item list. Remember to check out how to edit your item list if you need to refresh your knowledge: Step 4 - Add your item list: Folders and items
Add a deposit
- Add a new folder for you deposit. It will be easier for you to apply it later on.
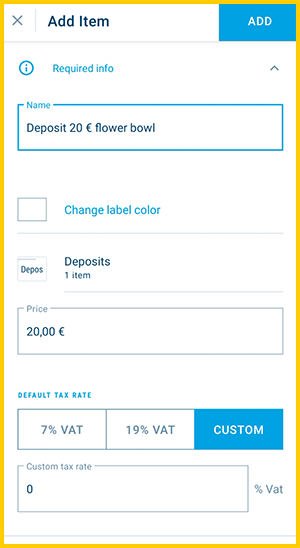
- Add a new item as usual and give it a descriptive name, e.g. "Deposit 0.25 bottle" or "Deposit flower bowl €20". If you are working with different deposit amounts, it will be clear to you while working.
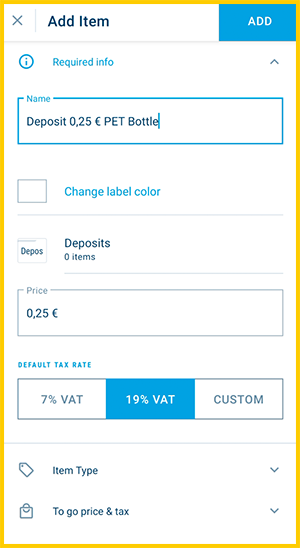
- Select a default tax rate.
Correct VAT for deposit items
Make sure that you assign the correct VAT to your deposit item.
If it is a legally regulated deposit, the VAT rate is determined by the item that is to be taxed. For bottles, this is usually 19 %.
If it is a free deposit for e.g. cutlery, plates, flower bowls or similar, you can enter 0% VAT.
Be sure to discuss this with your tax advisor if you are not sure how and if you have to pay tax on your deposit. - Activate "deposit item" in the items settings section “Item Type”.
Good to know: deposits are not allowed to be discounted. Thus the option “non-discountable” will be active for any deposit by default.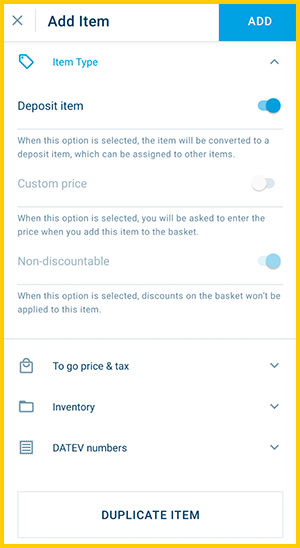
- Confirm by tapping on “Add”.
Apply a deposit to other items
You want your deposit to be automatically added to a specific drink or other items when you sell your wares. Assign your deposits to the corresponding folders or items.
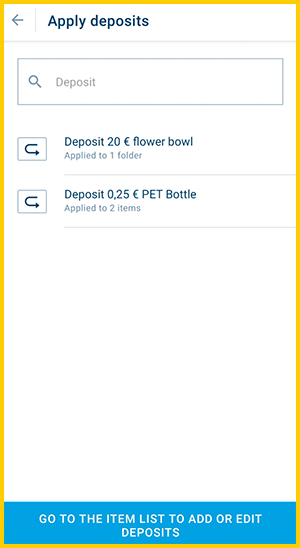
- Go back to item list > Apply deposits.

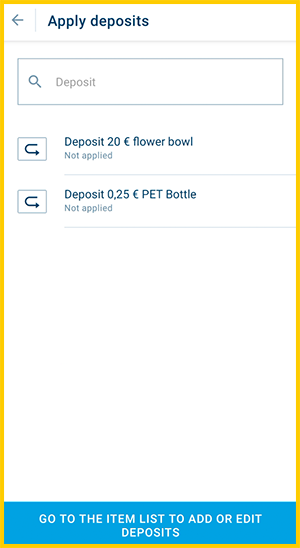
- Now you define which items should be sold with what deposit. Tap on the deposit item you want to assign to a specific item.
- Now select the item(s) to be sold with a deposit.
- You can choose entire folders. This means that you sell all items, that are in this folder or that you may add later, automatically with the predefined deposit.
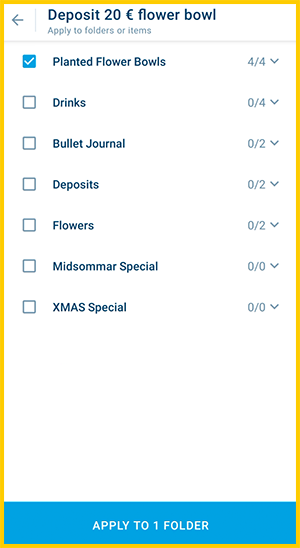
- Or you pick single items from a folder. Open a folder to view its items by tapping on the arrow on the right.

- You can choose entire folders. This means that you sell all items, that are in this folder or that you may add later, automatically with the predefined deposit.
- Confirm by tapping the blue button “Apply to…”.
- Repeat the steps above for each of your deposit items until all are assigned to items.
Do not assign your deposit to itself!
If you have added your deposit to a folder in which you want to assign it, make sure that you do not assign the deposit the deposit itself! It is best to use a separate folder for your deposit items so that mistakes like this don't happen.
Separate deposit item?
As soon as a deposit item has a different value or taxation than the existing deposits, add it as a new item.